
Highlights:
-
Identify damage depth first: Differentiate between shallow surface scuffs that only affect the finish and deep gouges that slice directly into raw wood fibers before starting any repair.
-
Prep work is essential: Thoroughly cleaning dirt out of scratch grooves and lightly sanding loose wood splinters ensures filler materials adhere properly to the floor.
-
Fill and sand flush: Use stainable wood filler pressed tightly into deep gouges, allow it to dry completely, and sand it level with the surrounding floor boards using fine-grit sandpaper.
-
Replicate wood grain and tone: Blend the repair seamlessly with the rest of the plank by applying matching wood stain and drawing subtle grain lines over filled spots using touch-up pens.
-
Protect the repair: Seal the area with two thin coats of clear polyurethane that matches the existing floor’s sheen level (satin, matte, or gloss) to prevent future wear.
-
Know when to hire a professional: Widespread damage covering large areas or deep moisture discoloration usually requires a full professional sand-and-refinish rather than spot repairs.
-
Practice proactive prevention: Keep pets’ nails trimmed short, place protective non-slip runners in high-speed traffic zones, and avoid rubber-backed rug pads that can damage wood finishes.
We love our dogs, but our hardwood floors rarely share that sentiment. Whether it is an enthusiastic greeting at the front door, a sudden sprint to chase a squirrel through the window, or just years of daily pacing, a dog’s claws can wreak absolute havoc on real wood flooring. Minor scuffs are frustrating enough, but deep gouges that penetrate through the protective finish into the bare raw wood beneath feel like a home decor nightmare.
You do not need to replace your whole floor or spend thousands hiring a professional restoration crew for a localized spot. Fixing deep pet claw scratches on wood floors is entirely doable as a DIY project if you follow the right process. In this complete step-by-step guide, we will cover how to assess the damage, gather the necessary materials, fill and repair deep claw marks, seamlessly blend the repair with your existing wood finish, and prevent future claw marks from ruining your hard work.
Understanding the Difference Between Surface Scuffs and Deep Gouges
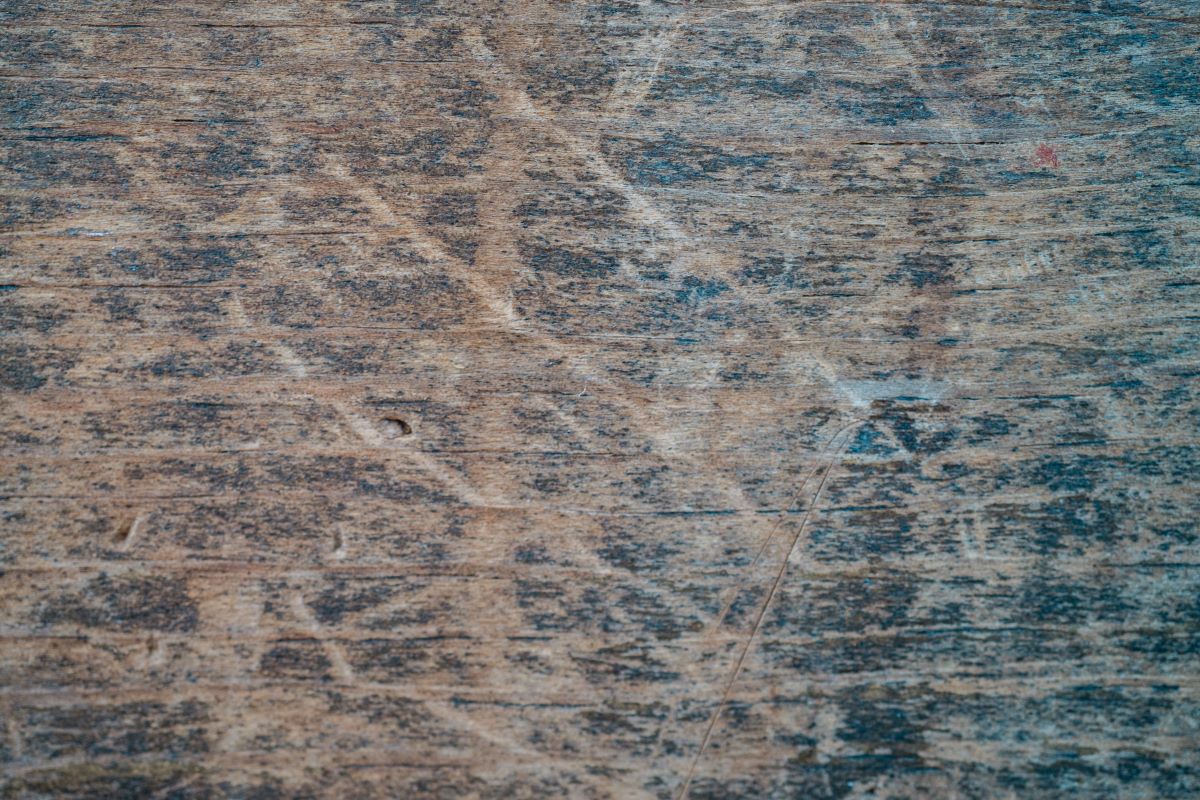
Before grabbing your tool belt, you need to know exactly what kind of damage you are dealing with. Treating a deep gouge like a simple surface scuff will leave you with patchy, visible marks, while over-treating light scratches wastes time and money.
Surface Finishes and Shallow Scratches
Shallow scratches only affect the topmost protective coat—usually polyurethane, lacquer, or wax. When light hits these scuffs, they appear as cloudy white lines or faint dull streaks, but if you run your fingernail across them, you will barely feel a ridge. These minor marks can usually be buffed out using a simple wood marker, polish, or a light application of fresh polyurethane.
Deep Scratch Gouges
A scratch qualifies as “deep” when your dog’s claws have sliced completely through the clear sealant and carved into the actual fibers of the wood plank below. These marks feel rough, jagged, or indented under your fingers. They often look dark or discolored because dirt, moisture, and dog paws have pushed grime down into the unprotected raw wood grain. Deep scratches demand structural repair—meaning you must clean, fill, sand, stain, and seal the damaged spot to make it look brand new again.
Essential Tools and Materials You Will Need
Having the right supplies on hand before you start ensures a seamless, professional-looking repair. Here is what you will need for fixing deep dog claw marks:
-
Mineral Spirits or Wood Floor Cleaner: To strip away old wax, oil, dirt, and debris from inside the gouge.
-
Microfiber Cloths: For wiping down surfaces without leaving lint behind.
-
Fine-Grit Sandpaper: Keep both 180-grit and 220-grit sandpaper nearby to smooth raw wood and smooth out filler.
-
Color-Matched Wood Filler or Wood Putty: Formulated specifically for interior floor repair. Stainable wood filler works best if you plan to match a custom floor stain.
-
Flexible Plastic Putty Knife: Plastic avoids accidentally carving fresh scratches into the surrounding finish while you work.
-
Wood Stain or Gel Stain: Matches the natural tone and color depth of your current hardwood planks.
-
Touch-Up Stain Pens or Color Pencils: Great for re-drawing subtle natural wood grain lines over filled areas.
-
Polyurethane Finish: Choose the sheen that matches your current floor (satin, semi-gloss, gloss, or matte) in either water-based or oil-based formulas.
-
Painter’s Tape: Protects the undamaged surrounding floor planks while you sand and fill.
Preparing the Damaged Hardwood Area
Preparation makes or breaks wood repair projects. If you apply filler or stain directly over dirty, splintered wood, the patch will peel up or turn muddy within a few weeks.
Step 1: Clean the Scratched Area Thoroughly
Vacuum the room to remove loose dirt, dust, and pet hair. Next, dampen a microfiber cloth with mineral spirits or a dedicated hardwood floor cleaner and scrub directly inside the deep scratches. Dogs carry natural oils and outdoor dirt on their paws, which get compressed into claw marks. Removing these contaminants ensures that your wood filler adheres securely to the wood fibers. Allow the floor to dry completely for at least 15 to 20 minutes.
Step 2: Remove Loose Wood Splinters
Dog claws tend to crush and tear wood fibers, leaving tiny splinters hanging along the edges of deep grooves. Take a piece of 180-grit sandpaper and lightly sand along the direction of the wood grain right over the deep scratch. Do not sand across the grain, as this creates cross-hatch marks that are difficult to hide later. Continue until any rough edges feel flush and smoothed out. Wipe away the resulting sanding dust with a dry microfiber cloth or vacuum brush attachment.
Step 3: Tape Off the Repair Zone
Surrounding your work space with blue painter’s tape isolates the repair zone. Leave about an eighth of an inch of space around the scratch. Taping prevents you from accidentally spreading wood filler or stain onto the surrounding glossy finish, saving you tons of cleanup effort later.
Step-by-Step Guide to Repairing Deep Dog Scratch Marks
Now that your workspace is clean, prepped, and taped, you are ready to fill in the deep gouges left by your pup.
Step 1: Apply Color-Matched Wood Filler
Scoop a small amount of stainable wood filler onto the tip of your flexible plastic putty knife. Press the filler firmly down into the scratch, pushing across the grain to ensure it packs tightly into the lowest depths of the groove. Leave a tiny mound over the scratch—wood filler shrinks slightly as it cures and dries, so filling it slightly higher than the surrounding board prevents an indented surface later.
Step 2: Scrape Away Excess Filler
Hold your plastic putty knife at a 45-degree angle against the floor and glide it across the top of the repair to scrape away excess putty. Focus on keeping the filler contained directly within the scratch itself while leaving the surrounding floor clean.
Step 3: Allow Adequate Drying Time
Let the wood filler dry completely according to the manufacturer’s instructions on the package. Drying times range from two to eight hours depending on humidity, temperature, and how deep the gouge was. Do not rush this step—sanding damp filler pulls it right back out of the scratch.
Step 4: Sand the Filler Level
Once fully dry, wrap a piece of fine 220-grit sandpaper around a flat sanding block. Gently sand the mounded filler using light pressure in the direction of the wood grain. Continue sanding until the filled patch is perfectly flat and flush with the surrounding hardwood floor board. Pass your fingers over the repair—you should feel a seamless transition from wood to filler.
Step 5: Clean Sanding Residue
Wipe away every trace of fine wood dust using a dry microfiber cloth, followed by a barely damp tack cloth. Any remaining dust will get trapped under your topcoat finish, creating a rough, gritty texture.
Blending Stain and Detail Work to Match Your Floor
Filled wood often looks like an obvious, solid patch because real hardwood features color variations, rings, and fine grain streaks. Color blending bridges that gap so your repair disappears into the background.
Choosing the Right Wood Stain Color
If your wood filler is pre-tinted to match your floor, you might only need a thin wipe of stain. However, if you used a neutral stainable filler, pick a liquid wood stain or gel stain that matches the base tone of your floor.
Apply a small dab of stain onto the patch using an artist’s paintbrush or rag. Let it sit for 3 to 5 minutes to penetrate, then gently wipe away the excess with a clean cloth. If the color is too light, apply a second thin coat until the shade matches the surrounding wood.
Mimicking the Natural Wood Grain
Real wood is rarely a solid single shade. If your hardwood floor features dark grain lines (common in oak, hickory, and walnut), a solid filled patch will still catch the eye.
To fix this, grab a dark brown wood touch-up marker or fine-tip wood graining pen. Carefully draw thin, subtle lines across the dried filled area to mimic the existing grain pattern running through the rest of the plank. Feather these lines out gently with your fingertip while the ink is damp to soften any harsh edges.
Sealing and Protecting Your Repair with Topcoat
The scratch is filled and colored, but it is still vulnerable to wear, moisture, and your dog’s paws if left unsealed. Re-applying a protective clear topcoat locks in your hard work.
Matching Finish Sheen Types
Polyurethane comes in four main sheen levels:
-
Matte: Virtually no shine; hides imperfections well.
-
Satin: Low shine with a soft luster; the most common residential hardwood finish.
-
Semi-Gloss: High shine and reflection; common in kitchens or high-traffic commercial spaces.
-
Gloss: Highly reflective, glass-like appearance.
Check your floor’s current sheen level carefully. Applying high-gloss polyurethane over a satin floor creates a distraction just as noticeable as the original scratch.
Applying the Clear Finish
Dip a small, high-quality natural or synthetic bristle brush into your clear polyurethane coat. Apply a very thin layer directly over the repaired patch, gently feathering the edges outward onto the adjacent original finish so there is no hard border.
Allow the first coat to dry according to the product guidelines (usually 4 to 8 hours). Lightly scuff the top of the dry coat with 220-grit sandpaper, wipe away dust, and apply a second thin layer. Two thin coats provide excellent protection against future wear and tear while building a uniform level of shine.
Knowing When DIY Isn’t Enough: Professional Refinishing
While localized spot repairs work wonders for isolated claw scratches, certain situations demand broader intervention. If your dog has spent years running down the same hallway, leaving hundreds of crisscrossing deep grooves across large expanses of wood, spot-filling every scratch will leave your floor looking patchy.
Recognizing these key indicators and signs your home needs pet-friendly upgrades helps you decide when it is time to move beyond spot repairs. When deep scratches cover more than 30% of a room’s floor area, or when pet urine has seeped deep into claw gouges causing dark black wood rot, hiring a professional floor contractor to sand the entire surface down to raw wood and re-finish it is the best path forward.
Preventing Future Dog Scratch Marks on Wood Floors
Once you have spent the effort repairing your floors, you will want to make sure you don’t have to repeat the entire process next month. Implementing a smart preventative maintenance routine protects your investment while keeping your home comfortable for your pets.
Regular Nail Trimming and Grinding
The single most effective defense against scratched wood floors is keeping your dog’s claws properly trimmed.
-
Frequency: Trim or grind your dog’s nails every 2 to 3 weeks.
-
The Floor Test: If you hear clicking sounds as your dog walks across the hardwood, their nails are long enough to touch the floor surface and apply scratching pressure.
-
Use a Nail Grinder: Traditional guillotine clippers can leave sharp, jagged edges. Rotary nail grinders sand claws down into smooth, rounded edges that glide over wood without digging in.
Using Dog Booties or Nail Caps
If you have a young puppy full of energy, a large breed dog, or an older dog prone to slipping, soft vinyl nail caps or rubber-bottomed booties offer instant floor protection. Nail caps slide over your dog’s existing claws using pet-safe adhesive and last 4 to 6 weeks before naturally shedding with the nail wall.
Strategic Use of Rugs and Runners
Analyze your dog’s daily movement routes around the house. Dogs usually scratch floors in high-acceleration zones:
-
Near the front and back doors where they run to greet visitors or head outside.
-
Around the base of staircases where they leap down.
-
High-speed turning corridors like long hallways.
Placing non-slip area rugs and long runners over these high-impact traffic zones absorbs the force of your dog’s stride, protecting vulnerable wood planks underneath while giving your dog better traction.
When placing area rugs over hardwood floors to protect against dog claws, always use breathable, non-rubberized rug pads underneath. Cheap rubber or PVC backing can trap moisture and chemicals against your floor, permanently discoloring or stripping your hardwood finish.
Wrapping It Up
Fixing deep dog claw scratches on your hardwood floors does not have to be an overwhelming or expensive process. By taking the time to properly clean, fill, sand, and seal the damaged areas, you can completely restore the natural beauty of your wood flooring without hiring a high-priced professional. Combine these simple DIY repair techniques with preventative habits like frequent nail trims and strategically placed runner rugs, and you will enjoy beautiful, scratch-free floors alongside your furry companion for years to come.

